Taking Prom Pics in Bright Sunlight
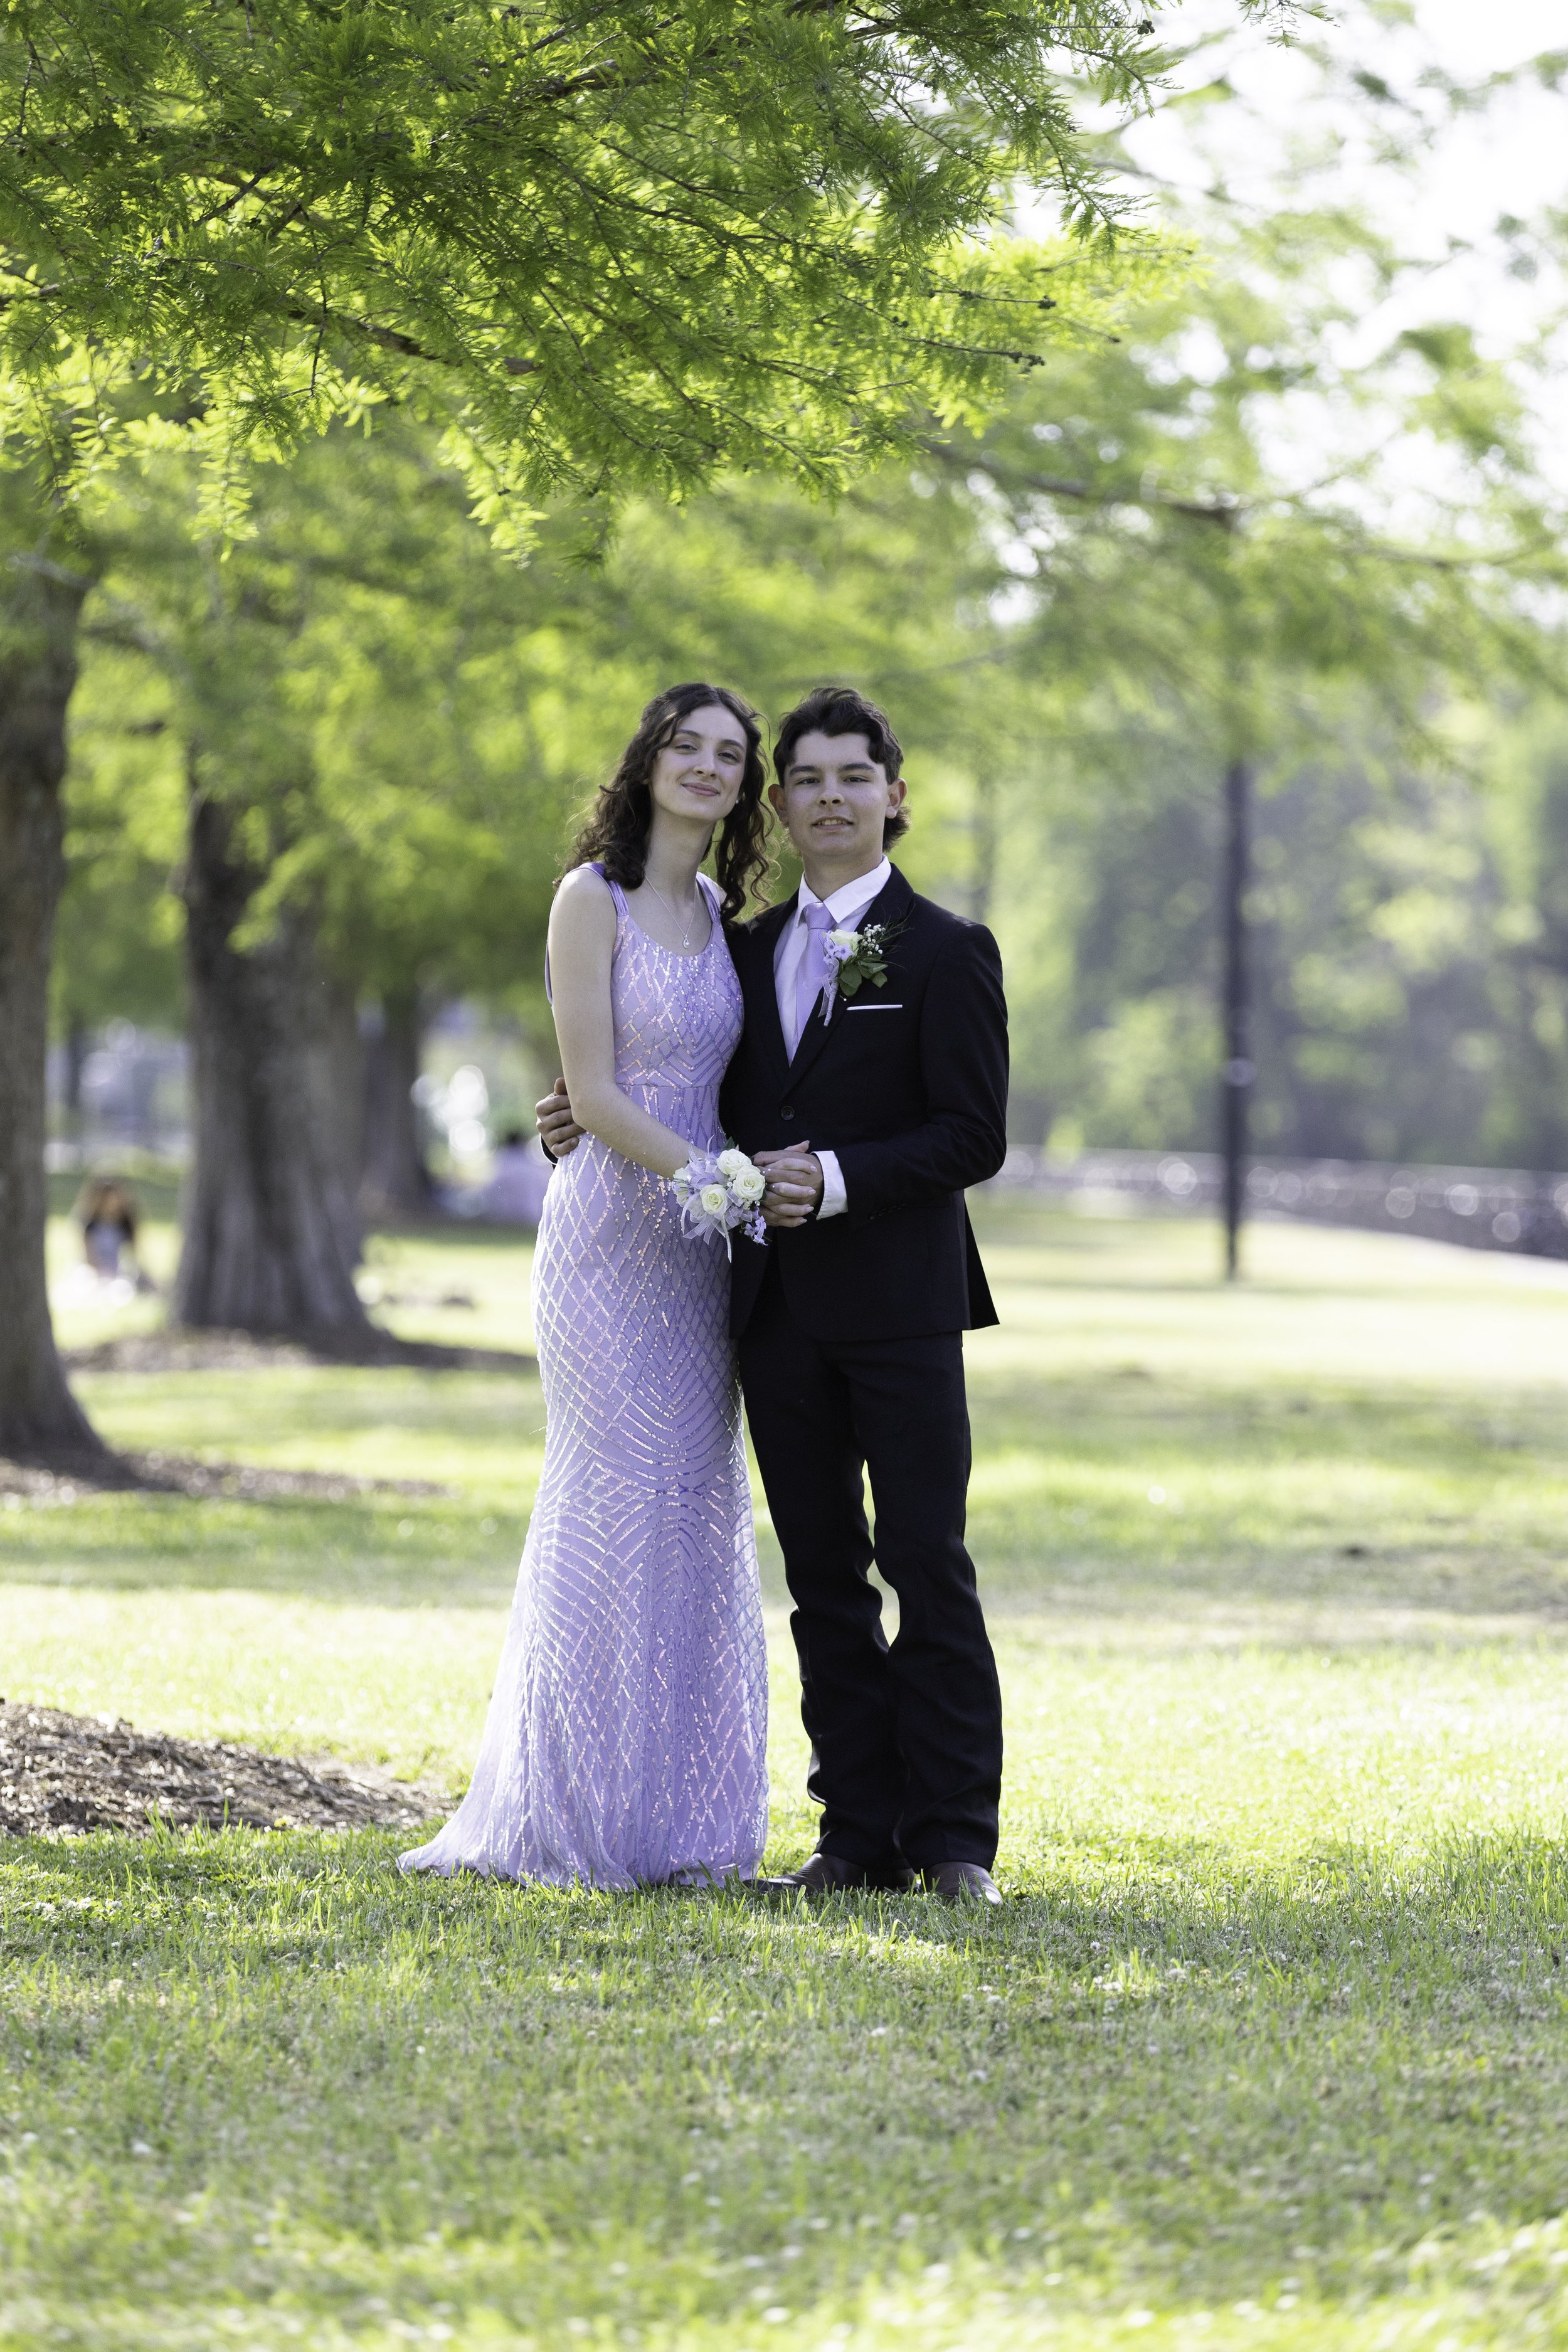
Avery and Hunter
Bright sunlight is pretty much the bane of every photographer. It creates harsh shadows, explodes highlights and washes away color. Every photographer has their own style and preference for negotiating with these challenges, and I have my own tips and tricks.
I took these photos for Avery and Hunter for their junior prom - in bright sunlight. There were some scattered clouds that would offer some relief, but they were too scattered and too elusive to be a reliable solution. So, I started scanning for objects, trees, and structures that would occlude the sunlight and provide for some more graceful and delicate photos. This is not always a viable solution however, and in some of the photos you will see I had to embrace the crushing sunlight.
I would have liked to do these photos either closer to golden hour or in an area that offers an excellent amount of shade, such as a garden. It’s not always up to me however, and I must accept the conditions with which I am presented with. Initially, the sun was far too bright to look at without significant degradation in quality. Not only from washed colors but from the subjects squinting and furrowing their eyes. This made for an uncomfortable setup, so I quickly avoided that angle. I found nice backgrounds, separated my subjects, and ensured that their backs were turned towards the sun. I actually enjoy shooting backlit subjects, it’s a personal preference.
Typically, I would utilize my flash, but this time I did not feel as though it would be necessary. The light scattering off of the concrete, water, and grass was more than enough to fill the subjects. You will see however, a few instances where I had to shoot away from the sun and had to face my subjects towards it. This time, we got lucky, and a very thin cloud made the sun just barely tolerable. This was my time, I had just a minute or so to pose and instruct Avery and Hunter. They managed the bright light, and I managed the (still) blown highlights. Below is a comparison of the before and after with my editing:


You can see how I recovered the highlights while maintaining the natural appearance of the skin tones and color. Also, observe how the delicate flowers and puffy clouds were recovered. I consider this a modest edit, I wanted to enhance the subjects and not add or change anything significant.
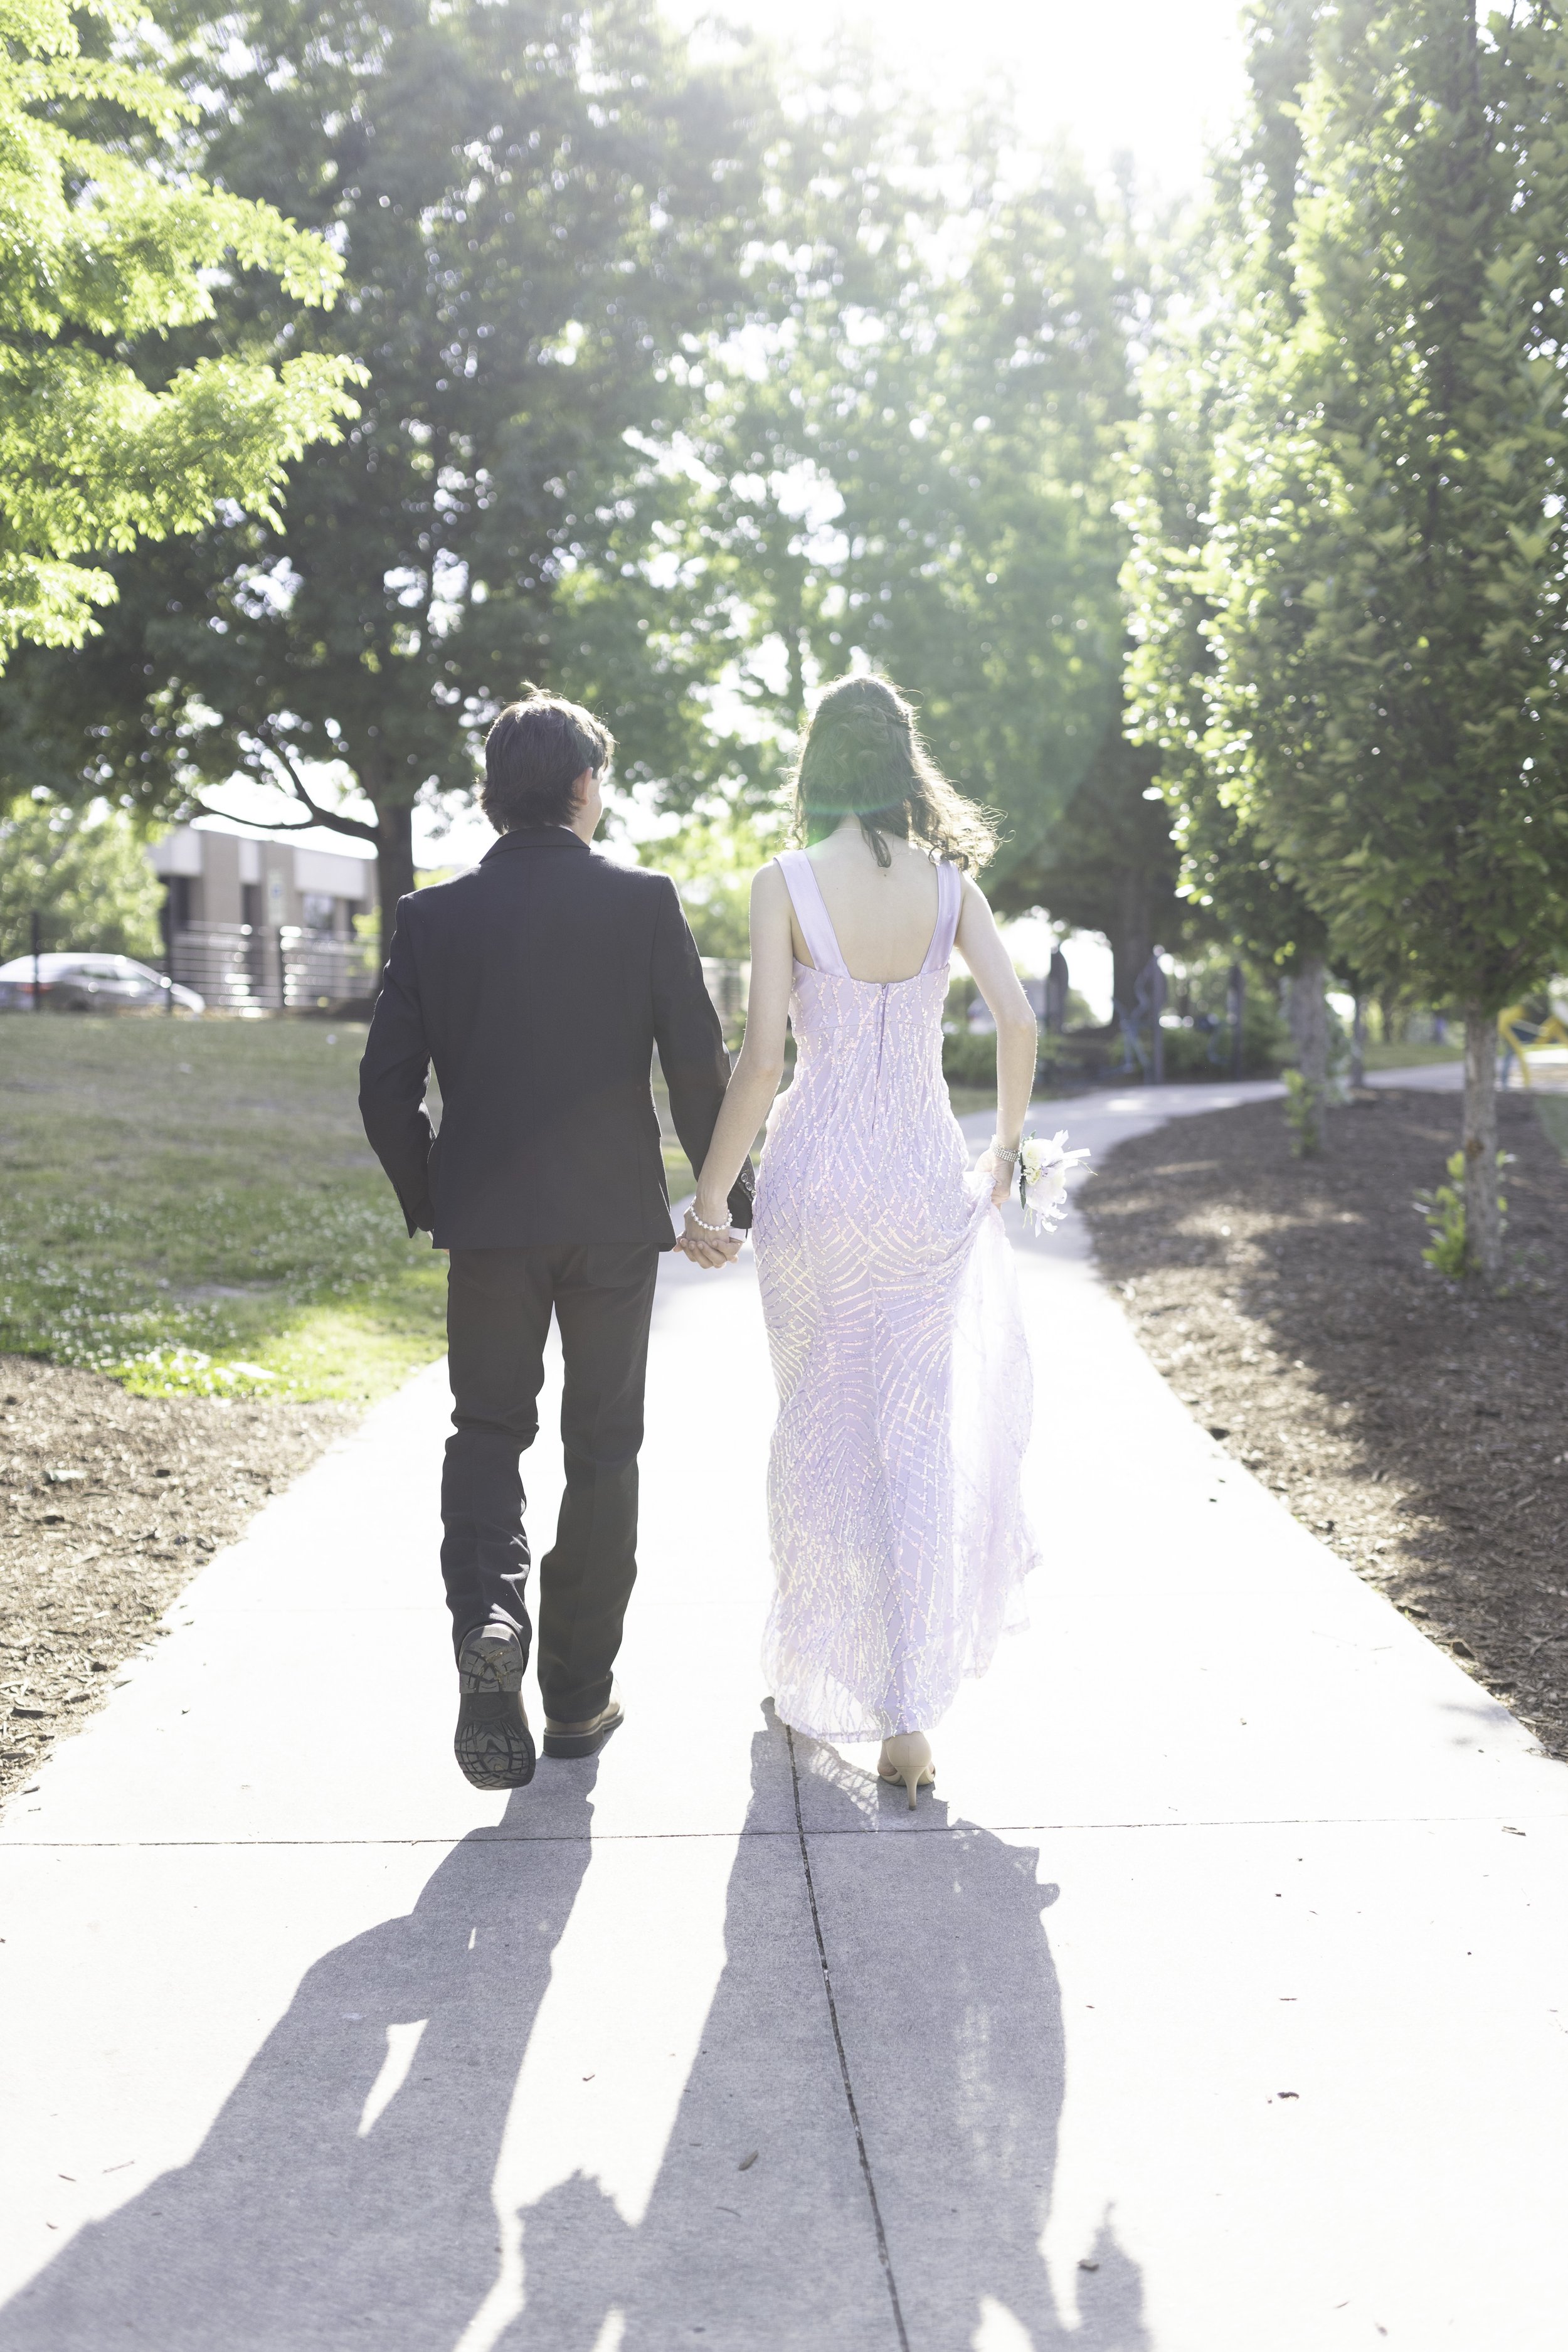
I subsequently spotted a really nice area that offered plenty of framing and foreground elements, and we negotiated with mud to get there. This solution to the bright sun completely avoided the problem all together by just setting up in the shade. I liked the warm light in the background and was certain that post processing would enhance it. I believe that RAW images should nearly always be processed at least just lightly, as there is so much data that can be recovered. RAW images tend to mute colors and shift skin tones, so they need to be processed to recover those. Below is the shot I am referring to, see how the skin tones were recovered?


After I took the previous photos, we hopped over to another shaded area, this time with a bit more bloom and highlights in the background. This allowed for bright and more neutral colors to be prominent which can be desirable when one wants to show off detail rather than color. Below is one such example from the shoot.

As you can see, I only slightly edited this photo. I really loved the prominent greens, and I shifted the hue of her dress just slightly. Often, I find that lovely greens from plants get mixed in with harsh yellow hues when they are illuminated by harsh sunlight. This photo contains a little of that, which I thought was very undesirable. I subtly shifted the yellow hue over towards green to restore the nice greens in the plants. The following photo shows an example where I was more aggressive with the hue shift.

While it may look quite subtle, I believe that it really does enhance the quality and color in the photo.
The headliner photo for this album is one of my favorites, everything just lined up nicely. While we still had to contend with the bright sun, it was much easier due to the shade which I found. Below is a before and after editing.


Again, this edit is just a subtle enhancement of the tones, hues, and detail that was already present. Like I previously mentioned, RAW photos really do need editing and adjustments so that they look pleasing, and here is a perfect example. In the unedited version, both Avery’s and Hunter’s skin tones are too green. It makes the photo feel off, and is not something that I would put out as a final proof. Some people might not be able to fully articulate why they don’t like the photo, their brain has already identified greenish looking skin, which throws the subjects into the “Uncanny Valley”, making the skin tones look a little zombie-ish. This is simply just due to how RAW images are captured and displayed.
For a quick tangent, RAW images are not capable of being viewed. What you see in camera when viewing a RAW image is actually an embedded jpeg preview of the image that has been created. The jpeg preview is then embedded into the metadata of the RAW file and that is what you see. So the camera has to make a ton of assumptions when rendering the preview which can sometimes be off.
Anyway, that is not so important, just a brief technical delve into the nuances of RAW files.
I enjoyed taking these photos, and I really enjoyed editing them. Please let me know what you think, or if you have any suggestions or critiques.
Thank you for reading!
David